Quantcast
Channel: 4MLinux Blog
Viewing all 51 articles
Browse latest View live

Welcome to 4MLinux blog!

$
0
0

My son told me that 4MLinux was the most stupid Linux distro ever, and (in a sense) he was right  :-)  4MLinux does many things in its very special way, which you will not find in any other distro. This is why I have decided to start this blog. You will find various 4MLinux tutorials here.

So once again : Welcome to 4MLinux blog!


4MLinux login.

$
0
0
Assuming that your copy of 4MLinux Live CD is ready, it's time to try it! Some people have a problem to log in into 4MLinux live CD. There is no default password in 4MLinux. You will be asked to choose one during the boot time.

Update:
New versions of 4MLinux LiveCD do not require any password to enter X.Org session, which is started automatically without needing to log in.
You still have to to setup root's password to be able to log in into 4MLinux, that is installed to a hard disk drive.


1) Boot your 4MLinux CD (or USB):


2) On the 1st screen you are asked to choose a password for root:


3) ...and to repeat this password:

Note: If you see any warnings ("Bad password: too short" or "Bad password: too weak"), you can ignore them now, meaning that you should repeat the same ("bad") password again. You'll be able to change it later. 


4) On the 2nd screen you can log in as "root", using this new password chosen by you:


Welcome to your 4MLinux Box!
Are you going to install 4MLinux to a hard disk drive? If so, please continue your reading here.

Partitioning in 4MLinux.

$
0
0
The main objective of this post is to describe how to perform disk partitioning before installing 4MLinux to a blank hard disk drive.

1) Boot your copy of 4MLinux Live CD (or Live USB) and select GParted from the Maintenance menu.


2) Create a new partition table. You should choose MSDOS (old standard) or GPT (modern solution). 


3) Create an ext4 partition (at least 1 GB in size) for your new 4MLinux.


4) Do you have an older machine with low RAM? If so, it is recommended to create a swap partition.


5) Are you going to use UEFI to boot? If so, you will need a FAT32 partition.


6) Time to apply changes.


7) The final step: you must set the FAT32 partition flag toESP (EFI System Partition).


Done!

Installing 4MLinux to your HDD.

$
0
0
4MLinux 20.0 (and later) supports all possible boot options:
- BIOS with 32-bit CPU,
- BIOS with 64-bit CPU,
- UEFI with 32-bit firmware,
- UEFI with 64-bit firmware.

The 4MLinux installation script assumes that you have an already formatted partition (1GB or bigger), which you can use for your new system. Otherwise, please readthis guideto learn how to perform disk partitioning.

Remember to make a backup of all your important data before installing any new operating system!

1) Select Installer from the 4MLinux menu.


2) The script starts with the Welcome screen. Read the instructions and press Enter to continue.


3) Let's say that you want to install 4MLinux on /dev/sda2, so you must choose '2' on the screen pictured below.


4) The script warns you that /dev/sda2 is NTFS formatted. If you are absolutely sure that you can use this partition, then you can choose 'y'.


5) Next, the script informs you about the necessity to install a new boot loader.By default, 4MLinux uses LILO (for computers with BIOS) and miniGRUB (for computers withUEFI).


6) After pressing Enter, you will see the summary screen. If everything is OK, you can choose 'y' and press Enter again. Otherwise (when you choose 'n') the script will quit without making any changes in your computer.


7) The script does its main work very quickly (in seconds rather than in minutes). Boot loader warnings can be safely ignored.


8) After rebooting your machine, you must setup root's password needed to log in. Next you can execute the startx command to start the X Window System

9) Have you any other operating system installed in your computer? If so, one more obligatory step: boot your new 4MLinux and select GNU GRUB from the Maintenance menu. 4MLinux will now install (or reinstall) GRUB adding all your operating systems to the boot menu. This is afully automatic process. 
 

Done!

Time to customize your new 4MLinux. Continue your reading here.
 

How to create the 4MLinux LiveCD/LiveUSB ?

$
0
0
Fortunately, there are many good resources in the Internet. You will find my recommendations below.

1) Download the following items:
  - InfraRecoder (if you wish to create live CD),  
  - UNetbootin (if you wish to create live USB), 
  - 4MLinux itself :-)

2) Watch this video to learn how to burn ISO with InfraRecoder, or follow this tutorial if you are going to use a live USB.

3) Boot your 4MLinux Live CD (or Live USB).

That's it!

Custom 4MLinux Desktop

$
0
0
You can change the appearance of your 4MLinux desktop just in a few clicks!

1) System monitoring software (Conky) is enabled by default. You can disable it by clicking the ConkyON/OFF icon:


And after your click:


2) Program launcher (Wbar) is enabled by default too. You can disable it by clicking the Wbar On/Off icon:


And after your click:


3) Let's change your wallpaper in 2 clicks :-)  The first one:


And the second one:


Ready!


Note: 4MLinux remembers your settings, meaning that you don't need to repeat this procedure each time when you start X.

Need more options? Continue your reading here.

WiFi setup in 4MLinux

$
0
0
It's not difficult to setup wireless networking in 4MLinux. Let's do it together now!

Note:

Network Configurator offers the quickest way to connect to your WiFi network:


* * * * *

System-wide Configuration Procedure.
1) Select WiFiScan from the Settings Menu:


2) Now you should be able to see all available WiFi networks (in our example, the network "xenu" has been detected that uses the "wlan0" interface):


3) Select NetConfig from the Settings Menu:


4) A terminal window will be opened. Choose '2' and press Enter:


5) Considering the result of our scanning (see: point 2), you already know that the 'wlan0' interface will be used, so you can choose 'n' and press Enter again:


6) And once again: considering the result of our scanning, you already know that the name of the network is "xenu", so your next answer must be as follows:


7) If you don't know how to answer the next question, then you should choose 'n' (because nearly all networks use dynamic IPs):


8) It is also possible to edit the advanced options if needed. We are skipping this stage now:


 9) It's time to connect to the the Internet.  You can do it by executing the "connect" command in your terminal:


Done!

NOTE:

If your network is password-protected, then you should use WPA Supplicant to configure your WiFi. The only difference will be an option to enter your password (which is "dfgr234!" in the picture below):


Antivirus Live CD

$
0
0
Antivirus Live CD is a 4MLinux fork including the ClamAV scanner. Both Ethernet (including Wi-Fi) and dial-up (including fast USB modems) Internet connections are supported to enable automatic updates of the virus signature database.

1) Boot your copy of Antivirus Live CD (or Antivirus LiveUSB):


2) Once it has booted, you can log in as 'root' using password 'root':


3) After executing 'help', you will see the following screen:


4) And after executing 'antivir', you will see this screen:


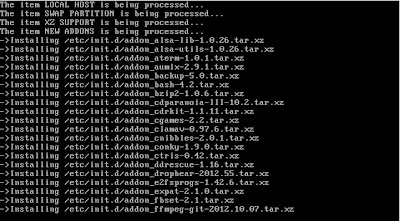
5) It is highly recommended to update virus databases:


NOTE:  
If you need to configure your Internet connection, you should run the 'netconfig' script (the procedure is very similar to the one described here).


6) And finally, when the update process is over, you can start the ClamAV scanner:


NOTE:
Antivirus Live CD will check all your disks against viruses. This is possible because all partitions are mounted automatically during boot so that they can be scanned by ClamAV (the supported filesystems are: btrfs, ext2, ext3, ext4, f2fs, fat16, fat32, hfs, hfs+, jfs, nilfs2, ntfs, reiser4, reiserfs, and xfs).

7) AntivirusLivecd hasMidnight Commander (file manager) and Links (text-based web browser), which can be very helpful in some cases:


NOTE: 
AntivirusLivecd is able to make a backup of your data (and to send it to a remote FTP/SFTP server if desired). Just try it yourself by executing 'backup' and 'fsbackup'  commands!

Good luck :-)


TheSSS

$
0
0
TheSSS (The Smallest Server Suite) is a lightweight server suite distributed as a live CD. It is designed for system administrators who need a very tiny set of server software for small local area networks. The supported servers are FTP, HTTP, SFTP, SSH, and Telnet. A proxy server (Polipo) with the Tor anonymizer is also included. The main security components are a 4MLinux Firewall (based on iptables) and Clam AntiVirus. TheSSS tries to follow the KISS principle as it was shown in this post.
 
Notes: TheSSS boots in the same way as 4MLinux does (this was described here).

1) Boot your copy of TheSSS:


2) After executing 'help', you will see the following screen:


3) Let's try the 'server' command now:


NOTES: 
There are some links at the bottom of this page. Follow them to learn more about particular servers included in TheSSS.
If you need to configure your Internet connection, you should run the 'netconfig' script (the procedure is very similar to the one described here).


4) Additionally, TheSSS provides antivirus protection, which works in the exact same way as it was shown in this post.


5) The installation of TheSSS to a hard disk drive can be performed by running the 'install2hd' script (have a look at this guide).


6) TheSSS hasMidnight Commander (file manager) and Links (text-based web browser), which can be very helpful in some cases:


NOTES: 
TheSSS is able to make a backup of your data (and to send it to a remote FTP server if desired). Just try it yourself by executing 'backup' and 'fsbackup'  commands! 
TheSSS is also able to display a huge number of information about your system. You can view them after executing the 'nmonitor' command.


Further reading:
FTP-HTTP - SSH - TELNET - FIREWALL - PROXY - MONITORING

BakAndImgCD

$
0
0
BakAndImgCDis a very small (about 20 MB in size) Linux-based operating system, which has been designed to perform the following two tasks: data backup (the supported filesystems are: btrfs, ext2, ext3, ext4, f2fs, fat16, fat32, hfs, hfs+, jfs, nilfs2, ntfs, reiser4, reiserfs, and xfs) and disk imaging (using Partimage, Partclone and GNU ddrescue). The output files (archives and images) can be optionally compressed and sent to a remote FTP/SFTP sever (via Ethernet, WiFi or Dial-up interface).


1) Boot your copy of BakAndImgCD:


2) Once it has booted, you can log in as 'root' using password 'root':


3) After executing 'help', you will see the following screen:


4) Let's have a look at some main commands now.

'backup' (manual backup of selected files)

'fsbackup'(automatic backup of all files)

'image'(creation of disk images)

'netconfig'(see: this post)


5) List of disk imaging utilities included in BakAndImgCD.

Partimage:


GNU ddrescue:

NOTE:
Partimage is (in my opinion) the best, but it does not support ext4 and btrfs filesystems. Partclone in BakAndImgCD is setup to create 'raw images', meaning that any kind of partition can be imaged. GNU ddrescue should be applied in case of read errors (to rescue data from partitions with bad blocks).

6) Additionally, BakAndImgCD hasMidnight Commander (file manager), Links (text-based web browser), and cfdisk/cgdisk (simple MBR/GPT partition managers), which can be very helpful in some cases:


The 4MLinux Server.

$
0
0
4MLinux (22.0 and later) comes with a feature-rich, the lightest and the fastest server suite available on the market. For example, 512 MB of RAM is enough to setup the 4MLinux Server and to run the Chromium web browser inside this server.

1. Installation.
Mount the 4MLinux Installation CD (or USB, or the ISO image downloaded by you), go to the folder named lamp, and execute the install.sh script in your terminal. Done!

2. Web interface.
The 4MLinux Server has its own web interface, which can be opened here: Menu -> Miniserver -> MiscTools -> LAMP
Note: 
Make sure that you have Firefox (or Chromium, or Opera, or SeaMonkey) installed to be able to access the interface. All these web browsers are available here: Menu -> Extensions -> NetApps.

3. Web interface: LAMP Admin.
The 4MLinux Server Web Interface consists of the following two items: LAMP Admin (http://localhost/admin) and Webmin (http://localhost:10000). LAMP Admin makes it possible to configure all the main LAMP server settings.
Note: 
You will need the admin's password, which has been randomly generated and written to the file named .admin_passwd located in the root's home folder.

4. Web interface: Webmin.
Webmin (highly modified to mach the 4MLinux Server settings) ships with an eye candy theme called Authentic Theme.
Note: 
Webmin is not available out of the box. The command to perform its initial setup is "webmin" (execute it in your terminal).

5. General server setup: keyboard layout.
4MLinux uses the "us" keyboard layout by default. This can be changed by editing the /etc/kbd.conf file with, for example, Midnight Commander or the Webmin File Manager.

6. General server setup: system time.
4MLinux uses UTC by default. This can also be easily changed by running the tzselect script in your terminal or via the Webmin interface.

7. General server setup: users and groups.
Users and their permissions are created in real time by the scripts, which start servers. It is also possible to manage users and groups by hand using either command-line tools or the Webmin interface.
 
8. General server setup: passwords.
Some passwords are randomly generated and distributed within the server if needed (see the point 3 above and the point 13 below). The root's password can be changed with the passwd command (directly or via Webmin).

9. General server setup: custom mount points.
Custom mount points can be added by editing the system-wide configuration files (see the note below) or with Webmin.
Note: 
The /etc/fstab file in 4MLinux is dynamically generated during each boot, so it does not make sense to edit it. Use the /etc/automount.conf and the /etc/fstab.local files instead. 

10. General server setup: autostart.
By default, only two daemons (SSH and Cron) are started during the boot. Edit the /etc/server/autostart.conf file to add more of them.
Note:
The 4MLinux Server autostart script is /usr/share/server/autostart.sh, while the system-wide autostart  script in 4MLinux is /etc/init.d/autostart.sh

11. LAMP server: Linux.
4MLinux uses the LTS Linux kernel. You should keep it (and the whole system) up-to-date by executing the "zk update" command.
Note: 
Updates are released monthly (usually on the first weekend of each month). 

12. LAMP server: Apache.
Apache web server in 4MLinux has the PHP support enabled by default. Command-line usage: httpd start (stop, restart, test).
Note: 
The "https" support (via stunnel) is also enabled by default. Go to the /usr/share/stunnel/script directory if you need to generate a self-signed certificate.

13. LAMP server: MySQL.
The 4MLinux Server incorporates the MariaDB database management system. Command-line usage: mariadbd start (stop, restart, test). You can use Adminer or Webmin to create/manage your databases.
Note:
Randomly generated MySQL root's password is stored in the .mysql_passwd file located in the root's home directory. Additionally, the password is exported to Webmin, meaning that its admin uses safe (password-protected) MySQL without the need to log in manually.


14. LAMP server: PHP.
The 4MLinux Server includes both PHP5 and PHP7 (see the note below). Additionally, the ionCube Loader is enabled by default.
Note: 
Open your terminal and execute the php7 command to disable PHP5 and to enable PHP7. And vice versa: execute the php5 command to disable PHP7 and to enable PHP5.

15. Other servers: SSH.
The SSH daemon in 4MLinux (OpenSSH) has the SFTP support enabled by default. Command-line usage: sshd start (stop, restart, test).
Note: 
ssh (from OpenSSH) and plink with psftp (from PuTTY) are available on the client-side.

16. Other servers: FTP.
The FTP server in 4MLinux (ProFTPD) is preconfigured to work out of the box. Command-line usage: ftpd start (stop, restart, test).
Note: 
lftp is available on the client-side. Additionally, you can try one of the following 4MLinux scripts: ftp, sftp, and fish.

17. Other servers: SMTP.
The 4MLinux Server uses Postfix as its mail transfer agent. It comes with Procmail and Fetchmail to provide a complete mail delivery system. Command-line usage: smtpd start (stop, restart, test).
Note: 
By default, for security reasons, the incoming traffic (from the Internet to your server's smtp port) is blocked by the 4MLinux Firewall.

18. Other servers: DNS. 
4MLinux uses BIND as its DNS server. When started, it points your name server (in /etc/resolv.conf) to localhost. Are you still able to surf the Internet? If so, this proves that your BIND is up and running :-)Command-line usage: dnsd start (stop, restart, test).
Note: 
By default, for security reasons, the incoming traffic (from the Internet to your server's dns port) is blocked by the 4MLinux Firewall.

19. Other servers: proxy. 
The 4MLinux Server incorporates Polipo (with an optional Tor support) as its proxy server. Polipo has its own web interface (http://localhost:8123). Command-line usage: proxy start (stop, restart, test).
Note: 
Go to the /etc/polipo directory to learn in details how the proxy server in 4MLinux works.

20. Maintenance & security: firewall. 
iptables can be managed with either Webmin (pictured below) or the 4MLinux Firewall. The latter has the following command-line usage: firewall start (stop, restart, test).
Note: 
Do not use Webmin for iptables if you need the brute-force and DDOS protection offered by the 4MLinux Firewall (see the next two points below).

21. Maintenance & security: brute-force protection.
BRF (brute-force protection) is enabled by default in the 4MLinux Firewall. It allows only a limited number of SSH login attempts.
Note:  
Go to the /etc/firewall/brf folder to view/edit the default settings. Execute 'firewall restart' to apply changes.

22. Maintenance & security: DDOS protection.
DDOS protection is disabled by default in the 4MLinux Firewall (see the picture below). When enabled, it automatically blacklists IPs/domains sending to many requests to your server. 
Note:
Go to the /etc/firewall/ddos folder to view/edit the default settings. Execute 'firewall restart' to apply changes.

23. Maintenance & security: antivirus protection.
The 4MLinux Server provides its users with the ClamAV scanner. Just open your terminal and execute the antivir command.
Note:
As you can see on the picture above, the antivir script can update both ClamAV itself and its virus signature databases, so it's quite easy to keep the antivirus software up-to-date. 

24. Maintenance & security: backups.
The 4MLinux backup scripts consist of the following three commands: backup (for manual backups), fsbackup (for automatic backups), and image (for disk imaging with GNU ddrescue, Partimage, and Partclone).
Note:
The rsync utility is also included. Alternatively, the lftp tool can also be used for syncing files.

25. Maintenance & security: system monitoring.
The 4MLinux Server includes a wide set of system monitoring tools. Just open your terminal and execute the nmonitor command.
Note:
All the programs (listed on the picture above) use ncurses, meaning that they are correctly displayed when a remote 4MLinux Server is accessed with a SSH client.

26. Maintenance & security: booting.
Webmin offers an interface to initiate the bootup and shutdown processes. 4MLinux itself supports all possible boot options: BIOS with 32-bit CPU, BIOS with 64-bit CPU, UEFI with 32-bit firmware, and UEFI with 64-bit firmware.
Note:
Execute the update-grub command in your terminal to install (or reinstall) GRUB with all your operating systems added to its menu (fully automatic process). Additionally, if you have UEFI, 4MLinux will ask you whether to install rEFInd for you.


Viewing all 51 articles
Browse latest View live